 Save to Pinterest
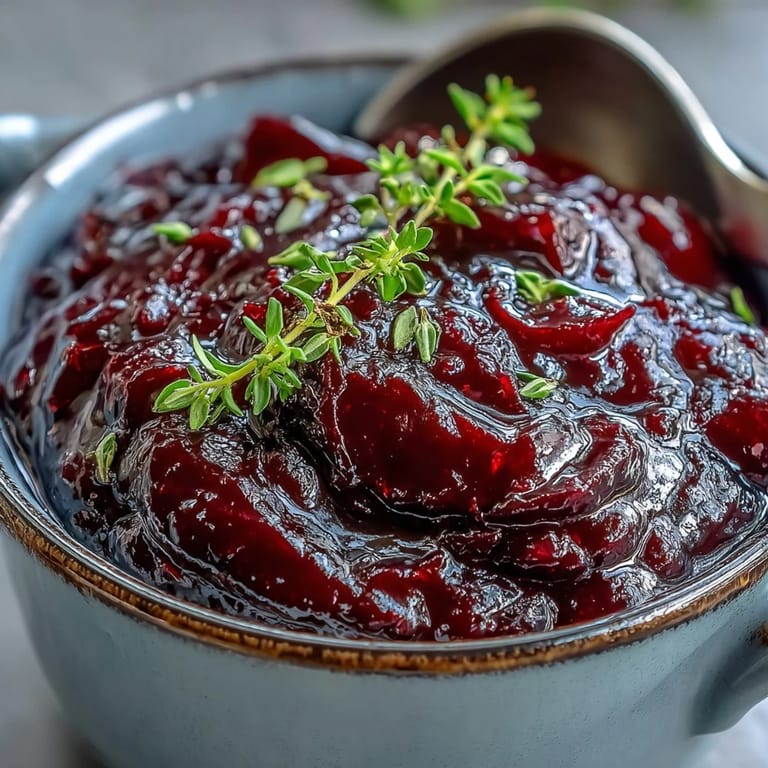
 There's something magical about the moment a glaze catches the light in your pan, shifting from dull and separated to glossy and unified. I discovered black currant glaze entirely by accident when I was searching my pantry for something to rescue what I thought would be a boring weeknight ham. That jar of black currant preserves had been sitting there for months, and pairing it with balsamic vinegar felt like a small gamble that turned into pure genius. The result was so unexpectedly bright and complex that I've been chasing that same feeling ever since.
My sister brought her new partner to Easter dinner, and I was determined to impress without spending all day in the kitchen. I glazed a ham with this recipe about 30 minutes before serving, and the smell alone had everyone hovering in the kitchen asking questions. By the time we sat down to eat, I realized the glaze had done the real talking, and I'd barely lifted a finger. That's when I understood this wasn't just a sauce, it was a shortcut to looking like you'd planned something thoughtful.
Ingredients
- Black currant preserves or jam: This is your flavor foundation, bringing deep berry notes and natural sweetness that no other preserve quite matches, though red currant or cherry work beautifully if that's what you have on hand.
- Balsamic vinegar: The secret weapon that transforms jam into glaze, adding complexity and that subtle tang that makes people ask what's in this.
- Honey: Just enough to round out the edges and create that silky mouthfeel without making it taste like dessert.
- Dijon mustard: Trust this detail, even if it sounds strange, because it adds savory depth and keeps the glaze from being too sweet.
- Unsalted butter: Melts into everything and brings a subtle richness that makes the whole thing feel intentional and finished.
- Brown sugar: Deepens the molasses notes and helps the glaze reach that perfect sticky consistency in just minutes.
- Fresh thyme leaves: Optional but worth finding, since the herbal note against black currant is absolutely worth the effort.
- Ground black pepper and salt: These aren't afterthoughts, they're the things that make people unable to identify exactly why they love it so much.
Tired of Takeout? 🥡
Get 10 meals you can make faster than delivery arrives. Seriously.
One email. No spam. Unsubscribe anytime.
Instructions
- Gather and combine your base:
- Pour the black currant preserves, balsamic vinegar, honey, Dijon mustard, butter, and brown sugar into a small saucepan. Don't overthink it, just get everything in there and set it on medium heat.
- Stir until smooth and melted:
- Watch as the butter softens the preserves and everything starts moving together as one thing instead of separate ingredients. This takes about a minute, maybe two, and it's weirdly satisfying to see the transformation happen.
- Add your flavorings:
- Stir in the fresh thyme (if you're using it), black pepper, and a small pinch of salt, then keep the heat steady and let it bubble gently.
- Let it simmer and thicken:
- Give it five to seven minutes of gentle simmering, stirring every now and then, until the glaze coats the back of your spoon and looks genuinely glossy. You'll smell when it's ready, honestly.
- Use it immediately or store:
- Brush it over your meat or vegetables in those final 20 to 30 minutes of cooking, or let it cool and serve as a side sauce if you prefer things less sticky.
 Save to Pinterest
 I remember standing in my kitchen on a random Tuesday, making this glaze just to have with roasted root vegetables for dinner alone, and suddenly understanding why people talk about comfort food with such reverence. It wasn't just delicious, it was the kind of thing that made a simple meal feel intentional and cared for. That's when cooking stopped feeling like a task and started feeling like a small act of kindness toward myself.
When to Use Black Currant Glaze
This glaze is at its best when you want something that plays well with others, meaning it enhances without overpowering. Roasted pork shoulder, glazed ham, even chicken thighs benefit from that glossy coating, but I've also brushed it on beets and parsnips with stunning results. The key is that last 20 or 30 minutes of cooking, when the glaze has time to caramelize slightly without burning.
Storage and Keeping
Leftovers sit happily in a sealed jar in the fridge for up to a week, and honestly, cold glaze on cold ham makes for excellent next day eating. I sometimes reheat it gently on the stove or in the microwave if it's gotten too thick, just a few seconds at a time so it loosens without breaking.
Substitutions and Variations
Don't be afraid to improvise here, because this formula is forgiving. Red currant preserves bring a slightly brighter edge, while cherry or even plum work when that's what's in your cupboard. If you're out of balsamic vinegar, rice vinegar or even apple cider vinegar will do the job, though the flavor shifts slightly and interestingly each time.
- Try adding a pinch of cayenne or ginger powder if you want a subtle heat that sneaks up on you.
- A tablespoon of bourbon or brandy added at the very end creates depth if you're feeling fancy or have it around.
- Fresh rosemary can stand in for thyme if that's what's growing in your garden or sitting in your crisper drawer.
 Save to Pinterest
 This glaze has become my secret weapon for making people think I spent way more time and effort than I actually did. It's the kind of thing that quietly improves every meal it touches, one glossy brushstroke at a time.
Recipe FAQs
- → What dishes pair well with black currant glaze?
This glaze excels on roasted pork, ham, chicken, duck, and root vegetables. The tangy-sweet profile cuts through rich meats while complementing their natural flavors.
- → Can I make this glaze ahead of time?
Yes, prepare the glaze up to a week in advance and store in a sealed jar in the refrigerator. Gently reheat before applying to your dish.
- → What can I substitute for black currant preserves?
Red currant, cherry, or blackberry preserves work well as alternatives. Each brings a slightly different flavor profile while maintaining the desired consistency.
- → How do I achieve the smoothest texture?
Strain the warm glaze through a fine mesh sieve to remove any fruit pieces or seeds. This ensures a perfectly smooth, professional finish.
- → When should I apply the glaze during cooking?
Brush during the last 20-30 minutes of cooking. This allows the sugars to caramelize without burning, creating a beautiful glossy exterior.
- → Is this glaze suitable for special diets?
This preparation is vegetarian and gluten-free. Those with dairy allergies can substitute the butter with a plant-based alternative.