 Save to Pinterest
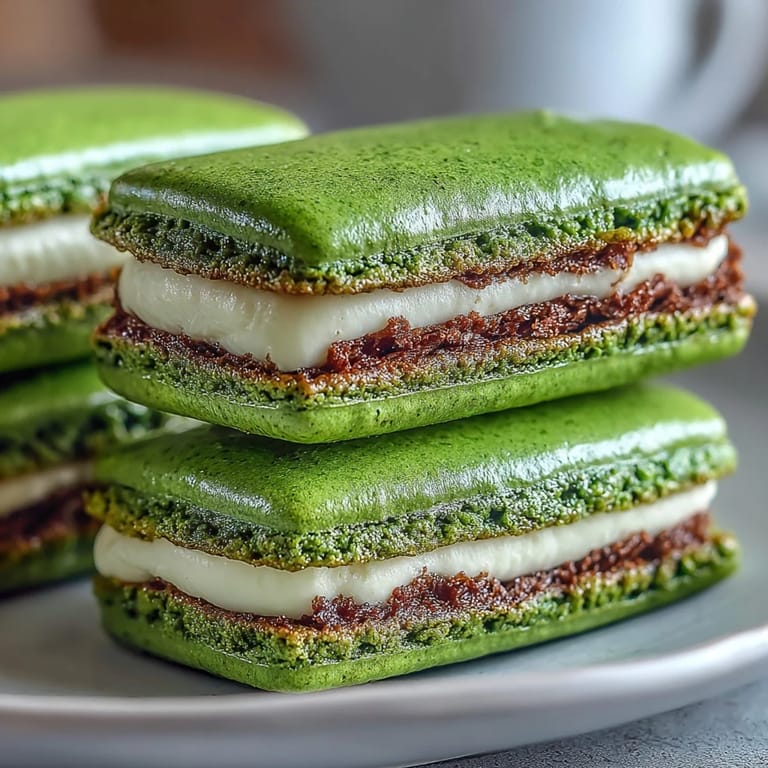
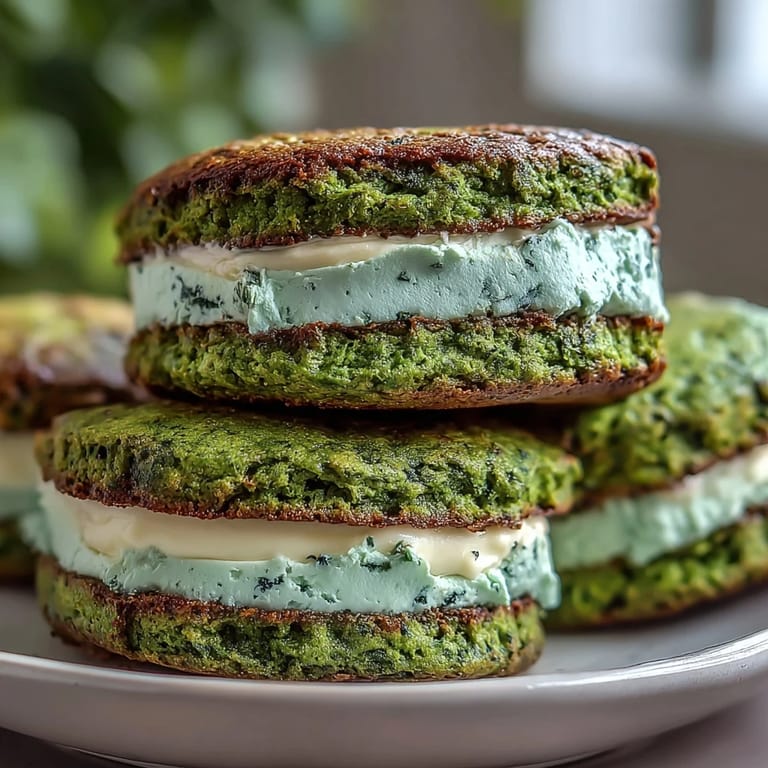
 My coworker showed up to the office one March morning with a box of these emerald-green sandwich cookies, and I couldn't stop thinking about them for weeks. The way the sparkling sugar caught the light made them look almost too pretty to eat, but their soft, buttery centers and creamy vanilla filling changed my mind instantly. I finally decided to recreate them at home, and now they're my go-to treat whenever I need something that feels both celebratory and comforting. There's something about handling that vivid green dough that just puts you in a festive mood, even if St. Patrick's Day is months away.
I made these for my daughter's classroom party, and watching the kids' faces light up when they saw the sparkly green cookies made me realize this recipe does something special—it turns an ordinary afternoon into something memorable. One little boy asked if they were real food or decorations, which honestly felt like the highest compliment.
Ingredients
- All-purpose flour (2 1/2 cups): This is your foundation, and measuring it properly matters more than you'd think—spoon it into the measuring cup and level it rather than scooping straight from the bag.
- Baking powder (1/2 tsp): Just enough to give the cookies a tender crumb without making them cakey or too risen.
- Salt (1/4 tsp): A small amount that you barely taste but completely changes how the butter and sugar flavors shine through.
- Unsalted butter (1 cup), softened: Room temperature is non-negotiable here—if it's cold, your dough will be grainy and tough instead of smooth and spreadable.
- Granulated sugar (1 cup): The workhorse ingredient that creams with the butter to create that light, fluffy base.
- Large egg (1): Brings everything together and adds moisture that keeps these cookies tender even after a day or two.
- Pure vanilla extract (2 tsp): Real vanilla makes a noticeable difference in the depth of flavor, not artificial-tasting like some shortcuts.
- Almond extract (1/2 tsp, optional): A whisper of almond that you won't necessarily identify but that makes people say your cookies taste somehow better than they expected.
- Green gel food coloring: The secret to vivid color without watering down your dough—liquid coloring will ruin the texture, so resist the temptation.
- Green sparkling or sanding sugar (1/2 cup): This is where the magic happens visually, so don't skimp on quality or use regular granulated sugar as a substitute.
- Unsalted butter (1/2 cup), softened for frosting: Separate from your cookie butter, and it needs to be soft enough to beat creamy.
- Powdered sugar (1 3/4 cups), sifted: Sifting prevents lumps that will give your frosting a grainy texture instead of silky smoothness.
- Milk (1 1/2 tbsp): Adjustable depending on how thick you want your frosting—add a touch more if it's too stiff, or a sprinkle more powdered sugar if it's too loose.
- Vanilla extract (1 tsp) for frosting: Keeps the filling flavor simple so it doesn't compete with the cookies.
Tired of Takeout? 🥡
Get 10 meals you can make faster than delivery arrives. Seriously.
One email. No spam. Unsubscribe anytime.
Instructions
- Set yourself up for success:
- Preheat your oven to 350°F and line those baking sheets with parchment paper now, before you start mixing anything. This takes ninety seconds but saves you from frantically searching for parchment when your hands are covered in dough.
- Build your dry ingredients:
- Whisk together the flour, baking powder, and salt in a medium bowl, making sure everything is evenly distributed. Setting this aside now means you can add it all at once to your wet ingredients without fumbling.
- Cream the butter and sugar:
- Beat the softened butter and granulated sugar together for two to three minutes until it looks noticeably lighter in color and fluffier in texture. This step is worth doing right because it aerates the dough and makes your cookies tender.
- Bring in the wet ingredients:
- Add your egg first, beating it in completely, then add the vanilla and almond extract. The mixture should look pale and smooth at this point, not separated or curdled.
- Add that stunning green color:
- Drop in your gel food coloring and blend it thoroughly until you reach the shade of green you want—start with less coloring than you think you need, because it concentrates as you mix. It's easier to add more than to lighten it if you overshoot.
- Combine everything:
- Gradually add your dry ingredient mixture to the wet ingredients, stirring until a soft dough just comes together. Don't overmix or you'll develop too much gluten and end up with tough cookies instead of tender ones.
- Coat and shape:
- Scoop tablespoon-sized portions of dough and roll them gently between your palms until they're smooth balls. Immediately roll each ball in the green sparkling sugar so the sugar sticks to the damp dough.
- Arrange and flatten:
- Place each sugar-coated ball about two inches apart on your prepared baking sheets, then gently press down with your palm to flatten them to about a quarter-inch thickness. They'll puff up slightly as they bake.
- Bake with attention:
- Bake for nine to eleven minutes, watching until the edges look set but the centers still look slightly underdone—this is the secret to keeping them soft. They'll continue cooking on the hot pan for a minute after you pull them out.
- Cool completely:
- Let the cookies cool on the baking sheet for a minute, then transfer them to a wire rack. They need to be completely cool before you frost them, or the frosting will melt and slide off.
- Make your frosting:
- Beat the softened butter until it's creamy and pale, then gradually add your sifted powdered sugar a bit at a time. Add the milk and vanilla, beating until the frosting is smooth, spreadable, and fluffy.
- Assemble your sandwiches:
- Spread or pipe a generous layer of frosting onto the flat side of half your cooled cookies. Press the remaining cookies on top, flat side down, then roll the exposed frosting edges in extra sparkling sugar if you want them extra sparkly.
 Save to Pinterest
 There's a moment when you pull these out of the oven and they're still warm and the green sparkles are glinting, and you realize you've made something that tastes as good as it looks. That's when these cookies stopped being just a recipe for me and became a small celebration in edible form.
The Secret to Soft Cookies
The biggest reason these cookies stay soft instead of drying out is because you're pulling them out of the oven while the centers still look slightly underdone. I know that sounds risky, but the residual heat finishes the baking, and you end up with that perfect chewy-tender texture that makes people reach for a second one before they've finished the first. If you wait until they look completely golden and set, they'll taste dry by the next day.
Playing with Flavors
The vanilla frosting is intentionally simple so it doesn't fight with the cookies, but you have options if you want to spin it differently. A drop or two of peppermint extract in the frosting creates a festive twist that feels like a totally different cookie, or you could tint the frosting a lighter shade of green and make it a more monochromatic treat. The almond extract in the dough is optional, but it adds a sophisticated warmth that makes people pause and try to figure out what makes these taste somehow better than basic sugar cookies.
Storage and Keeping
These keep beautifully in an airtight container at room temperature for up to three days, and honestly, they're still delicious on day three. If you're making them ahead for an event, assemble them the day of rather than trying to frost them days in advance, because the frosting can soften the cookies slightly if they sit too long.
- Stacking tip: Put parchment between layers if you're stacking them in a container, so the sugar coating doesn't stick to the cookie below it.
- Gift idea: Pack them in a pretty box or tin with a ribbon, and people will think you spent your entire day in the kitchen.
- Freezing option: You can freeze unfrosted cookies for up to two weeks, then frost them after they thaw—this is clutch if you're making them for an event.
 Save to Pinterest
 These cookies never fail to turn an ordinary day into something a little more festive, which is honestly why I keep coming back to them. They're easy enough that you can make them on a whim but special enough that people remember them.