 Save to Pinterest
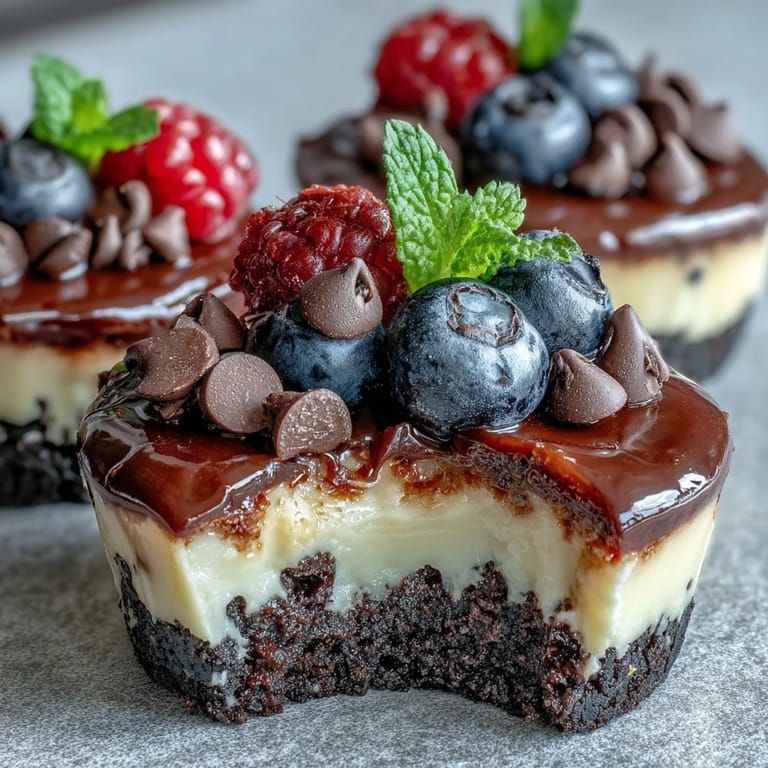
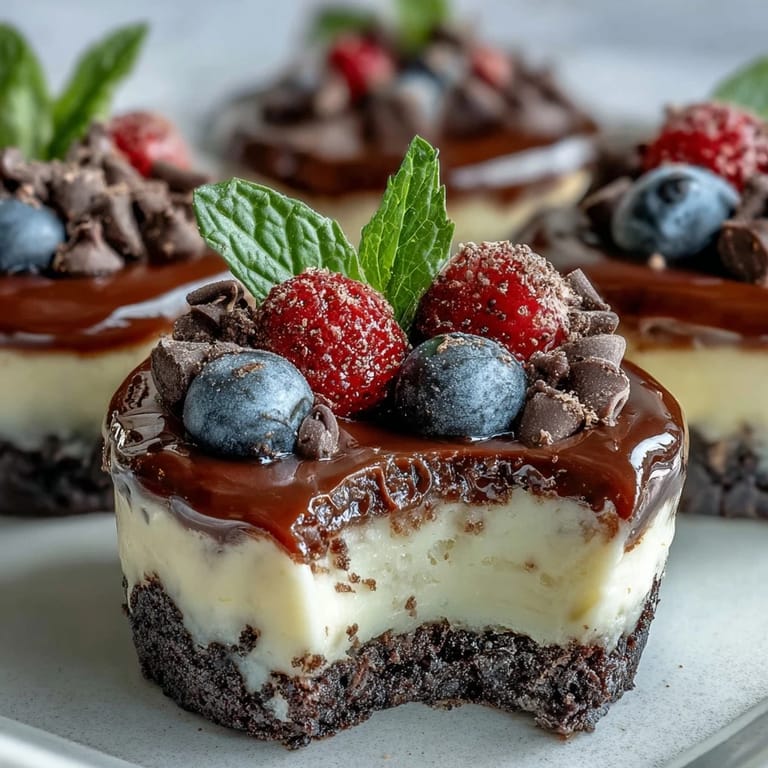
 There’s something wonderfully satisfying about miniature desserts, don’t you think? I stumbled upon these mini cheesecake bites during a frantic search for a party treat, and the moment I lifted a fork to my lips, I was sold. The combination of the rich, creamy filling and the crunchy Oreo crust was like a tiny explosion of joy. As I stood in the kitchen, trying not to eat the entire batch before my friends arrived, I knew I had discovered a true gem. Now, these little delights are my go-to for any gathering, beckoning guests with their inviting look.
Back at that first party, I remember overhearing my friends debating who got the biggest slice of cheesecake until I revealed these little bites. Suddenly, everyone was excited to have their own individual treat, and the laughs and chatter around the table created a warm, joyful atmosphere. I filled a platter high with these mini cheesecakes, and they vanished within moments, leaving everyone clamoring for more. It felt good to bring such happiness through a simple dessert. Who knew a little cheesecake could spark so much conversation?
Ingredients
- 24 Oreo cookies: The foundation of these bites, providing a rich and chocolatey crunch.
- 4 tbsp (60 g) unsalted butter, melted: Helps hold the crust together and adds richness.
- 16 oz (450 g) cream cheese, softened: The heart of the cheesecake, giving it that creamy texture we all love.
- 1/2 cup (100 g) granulated sugar: Sweetens the filling perfectly without overpowering.
- 2 large eggs: Aids in setting the cheesecake while still keeping it light.
- 1 tsp vanilla extract: Adds depth to the flavor, making every bite unforgettable.
- 1/4 cup (60 ml) sour cream: Introduces a slight tang and creaminess.
- Pinch of salt: Balances the sweetness beautifully.
- Optional toppings: Mini chocolate chips or fresh berries elevate these bites to the next level.
Tired of Takeout? 🥡
Get 10 meals you can make faster than delivery arrives. Seriously.
One email. No spam. Unsubscribe anytime.
Instructions
- Preheat and Prepare:
- Preheat your oven to 325°F (160°C) and line a mini muffin tin with paper liners to prepare for baking.
- Crust Magic:
- In a food processor, blitz the Oreo cookies until they resemble fine crumbs, then mix in melted butter until well combined.
- Spoon and Press:
- Spoon about one tablespoon of the Oreo mixture into each muffin cup, pressing down firmly to create a solid crust.
- Bake and Cool:
- Bake the crusts for 5 minutes, then let them cool while you make the filling.
- Beat It!
- In a large bowl, beat the softened cream cheese until smooth, then add the sugar and mix until creamy, introducing each egg one at a time for the best texture.
- Fill and Bake:
- Divide the cheesecake filling among the cups, filling them almost to the top, and bake for 12-14 minutes until the centers are set but still slightly jiggly.
- Chill Time:
- Allow the bites to cool at room temperature for 30 minutes before transferring them to the fridge to chill for at least 1 hour.
- Top It Off:
- Before serving, feel free to sprinkle with mini chocolate chips, chopped Oreos, or fresh berries for an extra touch of delight.
 Save to Pinterest
  Save to Pinterest
 Create a moment around these mini cheesecakes, and you’ll see how they can transform the atmosphere. Did I ever tell you about the time I surprised my book club with these after an intense discussion? Every scowl from deliberations melted away with the first bite, and suddenly we were simply friends, laughing and sharing. It’s amazing how food can connect people, isn’t it?
The Secret to the Perfect Bite
Dropping a few chocolate chips into the cheesecake filling before baking creates delightful pockets of melted sweetness. Honestly, I often find myself rushing to the fridge just to sneak another bite while I wait for them to chill. Each one is a burst of flavor that can brighten up any day.
A Creative Spin
For a fun twist, consider swapping out the Oreos for your favorite cookie or even adding a layer of fruit puree at the bottom of the crust. Experimentation is half the fun in the kitchen!
Last-Minute Fixes and Tips
If you find yourself in a hurry, the crust can be made ahead of time and refrigerated. Remember to keep an eye on the cheesecake in the oven though so you don't overbake!
- Let them cool completely before chilling for the best texture.
- A touch of lemon juice in the filling can brighten the flavor even more.
- These bites freeze wonderfully, just make sure they’re airtight!
 Save to Pinterest
  Save to Pinterest
 These mini cheesecake bites aren’t just a dessert; they’re an experience waiting to happen. Enjoy every creamy bite and the joy they bring!
Recipe FAQs
- → How long do these cheesecake bites need to chill?
They should chill in the refrigerator for at least 1 hour before serving to achieve the best texture.
- → Can I use other cookies for the crust?
Yes, you can use gluten-free sandwich cookies for a gluten-free version or any other cookie you prefer.
- → What is the best way to store leftovers?
Store in an airtight container in the refrigerator for up to 5 days. They can also be frozen for up to 1 month.
- → Can I make these in advance?
Absolutely! They can be made a day ahead and stored in the refrigerator until ready to serve.
- → What toppings can I add?
You can top them with mini chocolate chips, chopped Oreos, or fresh berries to enhance flavor and presentation.