 Save to Pinterest
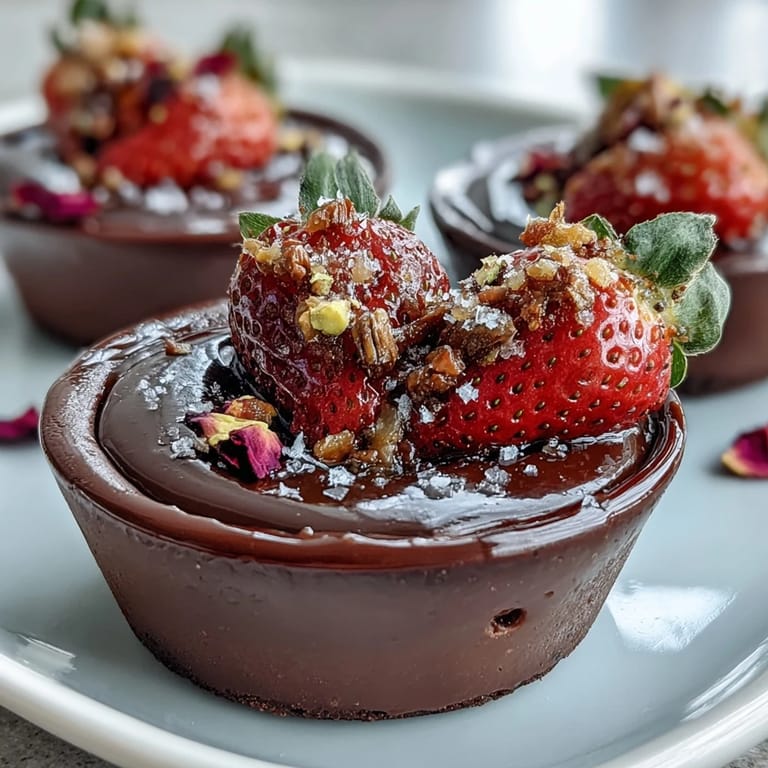
 A friend brought these back from Dubai and left them on my kitchen counter in a delicate box, and honestly, I couldn't stop thinking about them for weeks. The way the dark chocolate shell gave way to those jewel-like strawberries, the floral whisper of rosewater cutting through the richness, and that unexpected crunch of caramelized pistachios—it felt like tasting something from a luxury patisserie, but homemade. I finally reverse-engineered them one quiet afternoon, and now they're my secret weapon whenever I want to impress without spending hours in the kitchen.
I made these for my sister's book club last spring, and watching women in their fifties and twenties suddenly go quiet over something so elegantly small felt like real magic. One guest asked for the recipe and then admitted she'd been intimidated by homemade chocolate cups before—but seeing how forgiving the process actually is seemed to flip a switch for her. That's when I realized these cups aren't just dessert; they're an invitation to try something that seems fancier than it actually is.
Ingredients
- Dark chocolate (70% cocoa), 200 g chopped: Higher cocoa percentages snap cleanly when you're building the cups and provide a sophisticated counterpoint to the sweet strawberries—don't skimp on quality here since it's the structural star.
- Fresh strawberries, 250 g hulled and diced: Room temperature berries release their juice better into the rosewater mixture, so resist the urge to chill them beforehand.
- Rosewater, 1 tbsp: A tiny bottle goes a long way; this ingredient is potent and floral, so measure carefully or you'll taste soap instead of elegance.
- Honey, 2 tbsp: It acts as both sweetener and binder for the strawberry filling, creating a light syrup without being cloying.
- Orange zest, from 1 orange: Zest before you juice; those bright oils against the dark chocolate are what make people pause mid-bite and wonder what they're tasting.
- Unsalted pistachios, 60 g shelled and roughly chopped: The salt you add during caramelization matters more than pre-salted nuts, which can throw off the balance.
- Caster sugar, 2 tbsp: Finer than granulated, it dissolves faster and gives the pistachio crunch a glossier, more refined finish.
- Water, 1 tbsp: Just enough to dissolve the sugar without making the caramel too thin—precision matters here.
- Sea salt, pinch: A single pinch is your friend; it amplifies the pistachio flavor and keeps the caramel from tasting one-dimensional.
- Edible dried rose petals (optional) and extra chopped pistachios for garnish: These are the final flourish that turns a good dessert into something people photograph.
Tired of Takeout? 🥡
Get 10 meals you can make faster than delivery arrives. Seriously.
One email. No spam. Unsubscribe anytime.
Instructions
- Melt your chocolate gently:
- Use a double boiler if you have the patience, or microwave in 20-second bursts, stirring between each one—this prevents seizing and keeps the texture silky rather than grainy. You'll know it's ready when it flows smoothly off the spoon with no lumps.
- Coat the molds with care:
- A pastry brush gives you the most control, but the back of a warm spoon works just as well if you're feeling tactile. You want a thin, even layer that shows the mold's shape through the chocolate, not a thick crust.
- Double-coat for structure:
- After the first 10-minute chill, apply that second layer—it's the difference between cups that hold together beautifully and ones that crack when you unmold them. Twenty minutes in a cold fridge sets everything properly.
- Build your pistachio crunch:
- Heat the sugar and water together, then watch it turn golden amber; this takes about 3 to 4 minutes, and honestly, it happens faster toward the end, so don't step away. The moment you add those pistachios, stir constantly so they toast evenly without burning at the edges.
- Cool the crunch completely:
- Spread it on parchment the second it's done, then truly leave it alone until it's hard and snaps between your fingers. Breaking it into clusters while it's still warm turns it into sticky clumps, which defeats the purpose.
- Macerate your strawberries:
- The rosewater, honey, and orange zest need about 10 minutes to soften the berries and create a light, fragrant liquid around them. This is when you can unmold the chocolate cups without rushing.
- Assemble just before serving:
- Spoon the strawberry mixture in gently, then crown each cup with pistachio crunch and a light scatter of pistachios. If you add rose petals, place them last so they stay delicate and don't absorb moisture.
 Save to Pinterest
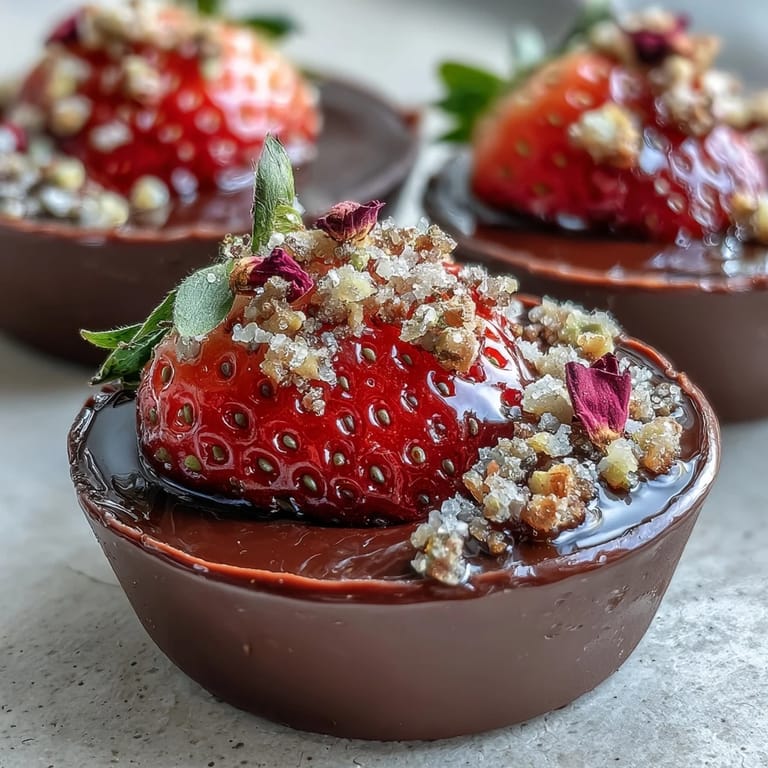
 My neighbor tasted one of these and spent the next week tracking down rosewater from specialty shops, determined to recreate them for her daughter's engagement dinner. She came back with stories about feeling like she'd unlocked a secret, and honestly, that's the feeling I chase when I'm in the kitchen—that moment when something handmade becomes a memory someone carries forward.
Working with Chocolate Cups
The most important thing I learned is that chocolate cups are far more forgiving than people think. Room temperature matters—work in a cool kitchen if possible, and if your chocolate starts to set too quickly, dip your brush or spoon in warm water and dry it before continuing. The silicone molds can go straight from refrigerator to room temperature without cracking, which means you can make the cups hours ahead and simply store them in a cool place until assembly time.
The Art of Pistachio Caramel
Pistachio caramel is forgiving right up until the moment it isn't, so stay present with it. The color shift from pale golden to deep amber happens in what feels like seconds, and over-caramelized pistachios taste bitter rather than nutty. Once you pour it onto parchment, resist the urge to stir or move it around—let it set undisturbed, and you'll get those satisfying clusters that crunch between your teeth with each bite.
Serving and Storage Secrets
These cups are best served within an hour of assembly, though they'll hold together for up to two hours if your kitchen stays cool. The filling softens the chocolate slightly over time, which some people love and others find less structurally satisfying, so know your audience. You can store unmolded chocolate cups in an airtight container at room temperature for three days, prepare pistachio crunch up to a week ahead in a sealed jar, and macerate strawberries just 30 minutes before you plan to serve.
- Chill the cups for a cooler, almost mousse-like texture that extends eating pleasure.
- Pair with mint tea, sparkling rosé, or even strong black coffee to balance the richness.
- A tiny splash of cardamom syrup drizzled over the filling adds warmth if you want to shift the flavor profile.
 Save to Pinterest
 There's something magical about serving food that looks like it arrived from a luxury patisserie but was actually made in your own kitchen. These chocolate cups remind me why I cook at all—not for complicated techniques, but for those quiet moments when someone bites through chocolate and discovers something entirely worth savoring.
Recipe FAQs
- → How do I prevent chocolate cups from melting during assembly?
Ensure the chocolate cups are fully chilled and set before adding the filling. Use a cool, dry workspace and handle them gently to avoid warmth from your hands.
- → Can I substitute pistachios in the crunch topping?
Yes, chopped almonds or hazelnuts can be used, though pistachios provide a signature nutty flavor and vibrant color that complements the other ingredients.
- → What is the purpose of rosewater in the filling?
Rosewater imparts a subtle floral aroma that enhances the freshness of strawberries and adds a Middle Eastern elegance to the flavors.
- → How long should the assembled cups be chilled before serving?
The cups can be served immediately after assembly or chilled for up to one hour to enjoy a cooler, firmer texture.
- → Is this suitable for gluten-free and vegetarian diets?
Yes, the ingredients are naturally gluten-free and vegetarian. Use vegan chocolate and agave syrup as alternatives for a vegan-friendly version.