 Save to Pinterest
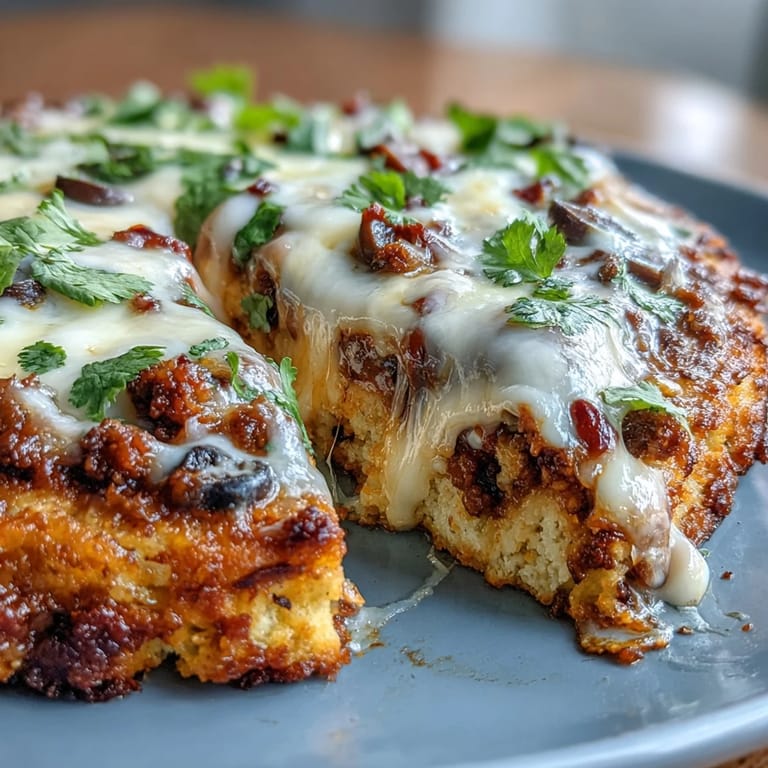
 Last Tuesday, my coworker wouldn't stop raving about her keto wins, and I'll admit, I was skeptical until she described this skillet—crispy cauliflower base, seasoned beef, melted cheese all in one pan. Something about the way she described that satisfying crunch mixed with the salty, spiced meat made me want to try it that same evening. I pulled a head of cauliflower from my crisper drawer and thought, why not? Two hours later, I was scraping the last cheesy bits from the skillet, wondering why I'd waited so long to combine my love of tacos with actually eating keto-friendly.
I made this for my sister during her visit, and she was convinced I'd cheated on the whole keto thing until I showed her the ingredient list. Watching her fork into it and then immediately stop mid-chew to ask what the base was made of—that reaction made the extra effort of squeezing out cauliflower moisture totally worth it. She asked for the recipe before dessert, which has never happened in our cooking history.
Ingredients
- Medium cauliflower head: The foundation matters, so look for a dense head without brown spots, and don't skip the squeezing step or your crust will be soggy and fall apart.
- Large egg: This binds everything together, so make sure it's at room temperature for better mixing.
- Shredded mozzarella cheese: Use low-moisture mozzarella or you'll end up with a greasy mess instead of a cohesive dough.
- Grated Parmesan cheese: Fresh grated tastes infinitely better than the pre-grated stuff and actually melts properly.
- Garlic powder and black pepper: These season the crust itself, not just the filling, which builds flavor throughout the dish.
- Ground beef: The 80/20 ratio gives you enough fat to stay moist without turning into a grease puddle when cooked.
- Onion and garlic: Finely chop the onion so it softens properly in the short cooking time, and don't use jarred minced garlic here because the taste difference is noticeable.
- Tomato paste, chili powder, cumin, smoked paprika: These create the actual taco flavor, so don't substitute or reduce them thinking you're saving effort.
- Cheddar cheese topping: Sharp cheddar adds more flavor than mild, and it browns beautifully on top.
- Fresh cilantro and diced tomato: These go on after baking so they stay bright and fresh instead of getting tired and wilted.
Tired of Takeout? 🥡
Get 10 meals you can make faster than delivery arrives. Seriously.
One email. No spam. Unsubscribe anytime.
Instructions
- Prep your oven and get your skillet ready:
- Set your oven to 425°F and make sure your oven-proof skillet is clean and ready because you'll be using it twice. This temperature is hot enough to get the crust crispy without drying everything out.
- Rice and dry out your cauliflower:
- Pulse the florets in the food processor until they look like coarse rice, then microwave for 5 minutes to start breaking down the moisture. The squeezing part feels tedious, but it's genuinely the difference between a crust that holds together and one that crumbles—wrap it in a clean kitchen towel and squeeze until your forearms hurt.
- Mix your crust dough:
- Combine the cooled cauliflower with egg, mozzarella, Parmesan, garlic powder, salt, and pepper in a large bowl, stirring until you have something that holds together when you press it. It should feel slightly sticky but not wet.
- Bake the crust foundation:
- Press the mixture firmly and evenly into the bottom of your skillet—use your fingers or the bottom of a measuring cup to get it compact and level. Bake for 15 minutes until the edges turn golden and the center feels set when you touch it gently.
- Cook your taco meat while the crust bakes:
- Heat a nonstick skillet over medium-high and add ground beef, breaking it apart with a spoon as it cooks for about 5 to 6 minutes until it's browned throughout. If there's a pool of rendered fat, drain most of it off (you want flavor, not grease).
- Build the taco seasoning base:
- Add finely chopped onion and cook for 2 to 3 minutes until it softens and becomes slightly translucent. Stir in minced garlic, tomato paste, chili powder, cumin, smoked paprika, salt, and pepper, cooking for just 1 minute to bloom those spices and make them fragrant.
- Simmer and thicken:
- Add water and let it bubble away for 2 to 3 minutes until the sauce thickens just slightly and coats the meat. You want it saucy enough to flavor the crust but not soupy.
- Layer and finish baking:
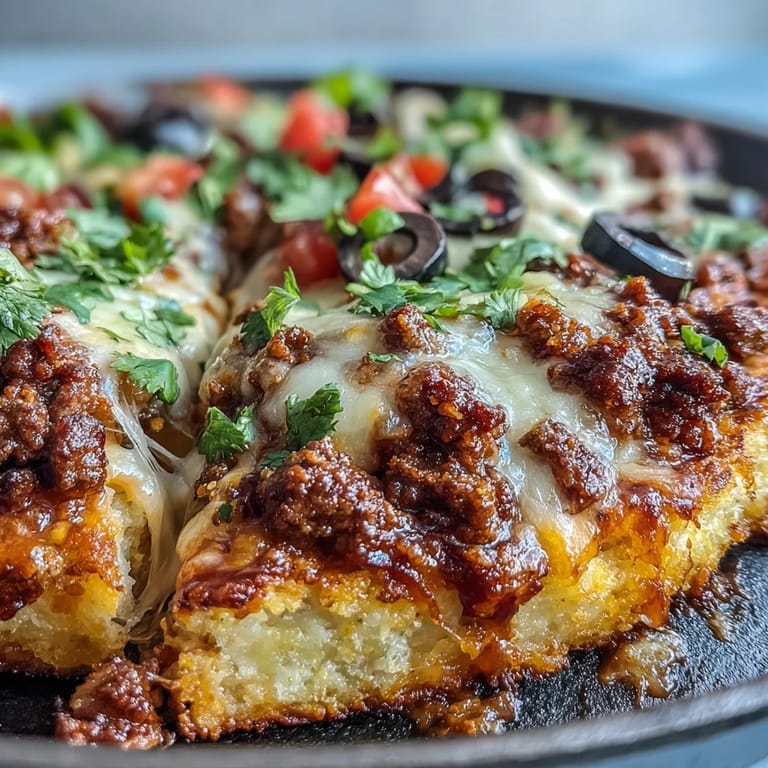
- Pull the golden crust from the oven and spoon the taco meat evenly over the top, then scatter cheddar cheese and olives across it. Return to the oven for 5 minutes until the cheese melts and turns bubbly.
- Finish with fresh toppings:
- Remove from oven and immediately top with diced tomato and fresh cilantro while everything is still warm so the flavors meld slightly. Serve with sour cream on the side if you want richness.
 Save to Pinterest
 There's something unexpectedly comforting about creating a whole meal that feels indulgent and cheesy while still fitting into a way of eating you care about. This skillet made me realize I wasn't actually tired of eating well, I was just tired of boring food.
How to Get the Crust Actually Crispy
The biggest mistake I made the first time was not pressing the cauliflower mixture firmly enough into the skillet, which meant the bottom stayed soft instead of developing that satisfying golden crust. The second mistake was opening the oven door halfway through baking because I was worried it wasn't cooking fast enough, but that just lets heat escape and slows everything down. Press firmly, don't peek, and you'll end up with a base that has actual texture and holds up to the weight of the taco filling.
Why Ground Beef Ratio Actually Matters Here
Using 80/20 ground beef instead of the leanest option means you get more flavor and moisture, which is essential in a low-carb dish where you're already losing some of the taste that breadcrumbs and other fillers would normally provide. Lean beef works too, but you'll notice the difference in how dry it can get, especially if you're not careful with the cooking time.
The Toppings Make It Feel Like a Real Meal
The moment you scatter fresh cilantro and diced tomato on top, this transforms from a keto experiment into an actual, craveable dish that happens to be low-carb. The freshness cuts through the richness of all that cheese, and the sour cream adds tang that makes every bite more interesting.
- Add a squeeze of lime juice over the tomato and cilantro for brightness that feels restaurant-quality.
- If you're meal prepping, keep the toppings separate and add them right before eating so they don't get soggy.
- Jalapeños or hot sauce on the side let everyone customize their heat level without changing the whole dish.
 Save to Pinterest
 This skillet proved that eating keto doesn't mean settling for less exciting food, and honestly, it's become my go-to when I want something satisfying without the post-meal heaviness. Make it once and you'll understand why.
Recipe FAQs
- → How do I prepare the cauliflower crust?
Riced cauliflower is microwaved, drained well to remove moisture, then mixed with egg and cheeses before being pressed into a skillet and baked until golden.
- → What spices enhance the taco filling?
Chili powder, cumin, smoked paprika, garlic, and tomato paste create a flavorful, well-seasoned filling.
- → Can I substitute the ground beef with another protein?
Yes, ground turkey or chicken work well and can be used interchangeably without changing the dish's texture.
- → Is this dish suitable for low-carb diets?
Yes, the cauliflower crust replaces traditional flour bases, making it a fitting option for low-carb and keto-friendly meals.
- → What toppings complement the skillet?
Fresh diced tomatoes, cilantro, sliced olives, and sour cream add brightness and creaminess to balance the rich flavors.